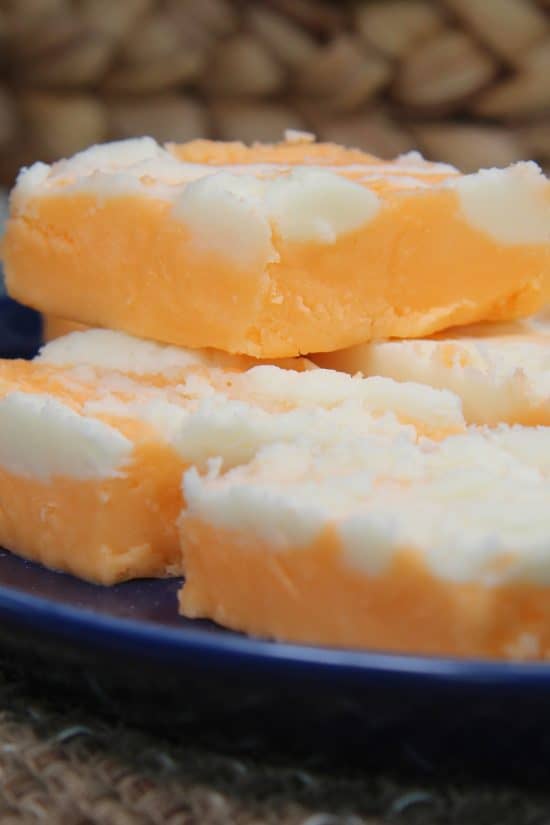
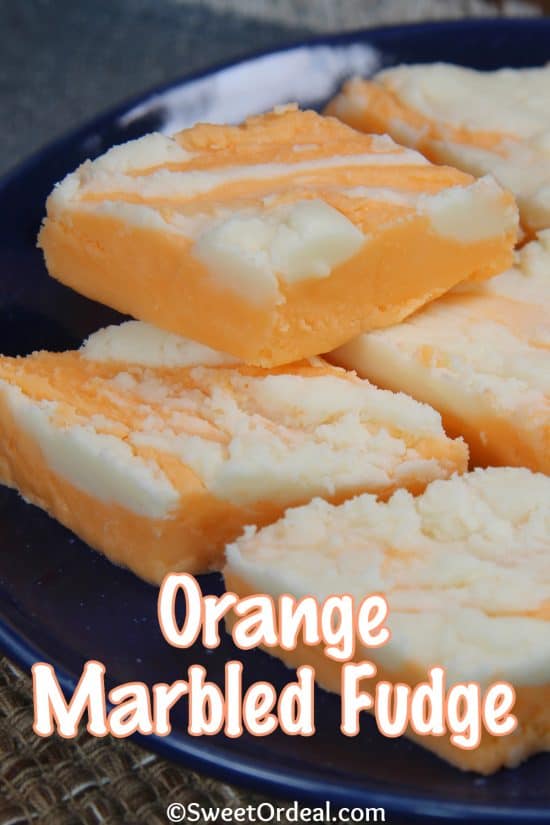
Orange Marbled Fudge
Orange Marbled Fudge tastes a lot like a Creamsicle or 50/50 Bar, but in a creamy fudge form. It’s cool and refreshing, popping with sweet orange flavor. The perfect after-dinner treat.

Those with a sweet tooth are going to love this recipe.
The combination of butter, heavy whipping cream, marshmallow creme, and vanilla (or white) chips is a sweetened version of fudge delight.
Ok, enough talk, let’s make some fudge.
Making Orange Marbled Fudge
Line a 13 x 9″ baking dish with parchment paper or waxed paper. Also, leave one side of the paper a little long so that you can use it as a handle for when you want to pull it out later.
Then, add the sugar, butter, and heavy whipping cream to a large saucepan. Cook over a low heat and stir until the sugar is completely dissolved.
Next, increase the heat and bring it to a boil for four minutes, stirring the whole time.
TIP #1: The next couple steps should be done quickly, as the fudge starts to set up as soon as you take it off the heat. Don’t worry if the surface doesn’t end up perfectly smooth, once you cut them into squares, nobody will notice.
I got distracted and the reserved fudge cooled off some. It didn’t swirl as well as I would have liked it to, but it still tasted great and looks pretty in pieces.

After the four minutes, remove the pan from the heat and stir in the chips and marshmallow creme. Keep stirring until the chips are fully melted and the fudge is smooth and lump-free.
Remove one cup of the mixture and set aside. (See TIP #2 below.)
To the mixture still in the saucepan, add the orange extract and orange food coloring.
Stir, stir, stir until the color is consistent, then pour it into the prepared baking dish.
Then, dollop the reserved mixture by heaping teaspoons in an even pattern across the top, then run a knife through the mixture to create a swirl, or marbled appearance.
Cover and place in the refrigerator to set up, approximately 2 – 3 hours.
Alternative to Marbling
TIP #2: If the marbling isn’t important to you, but you would prefer a smooth even surface, skip the step of removing a cup, then adding it back in later. Rather, add the orange extract and food coloring, then pour directly into the pan and let it set up in the fridge. The fudge will be solid orange, which would be just as beautiful.
Once set, use the paper “handle” to remove the fudge from the dish and cut into cubes, or diamonds, like I did. Or, cut the diamonds in half for smaller triangles.
Whatever shape you cut, they’re scrumptious.
More delicious recipes:
If you love fudge, you might want to try my Tipsy Walnut Fudge. So good! The Kahlua makes it a wee bit tipsy, which makes it a favorite of mine during the holidays.
If you love all things “orange,” you should really try my Cinnamon Orange Swirl Cake and Tropical Orange Crush Cake. I also have cupcakes, such as Orange Juice Cupcakes and Orange Cupcakes with Vanilla Frosting.
Not to be out done, I also have a Cherry Orange Frosty and Orange Cream Cheese Bars.
So, go ahead and get your orange on.
If you tried and love this recipe, please leave a 5-star rating on the recipe card and consider leaving a comment below. Thank you so much.

Orange Marbled Fudge
Ingredients
- 3 cups granulated sugar
- 3/4 cup butter
- 3/4 cup heavy whipping cream
- 11 oz. bag white or vanilla chips
- 7 oz. jar marshmallow creme
- 3 tsp. orange extract
- 3 drops orange gel food coloring
Instructions
- Line a 13 x 9" baking dish with parchment paper or waxed paper. Leave enough paper hanging over a side as a handle to remove the fudge.
- In a large saucepan, mix together the sugar, butter, and whipping cream. Over low heat, cook and stir until sugar is dissolved. Increase heat; bring to a boil, stir for 4 minutes.
- Remove from heat. Stir in chips and marshmallow creme until smooth and lump free. Remove 1 cup and set aside.
- To saucepan, add orange extract and food coloring.* Stir until color is consistent, then pour into baking dish. Dollop reserved mixture over top in even pattern, then cut through mixture with a knife to swirl the white with the orange.
- Cover and refrigerate until set, (approx. 2 – 3 hours). Remove the fudge from the dish, peal off the parchment paper, and cut into squares. Enjoy!
Notes
Nutrition
Orange Marbled Fudge
Follow me on Pinterest and sign up for emails to receive the latest recipe leaving my kitchen.
In the meantime, I hope you have yourself a blessed day.

A quick mention of this wonderful blank recipe book that I helped to create with a very dear friend. Write in one or more recipes before giving it to that special person, then they can fill the remaining pages with their favorites, and/or have other special people write out recipes for them. It’s personal, and yes, it takes time and effort — something we’ve gotten away from with all this technology. Check it out HERE where you can order a hard or soft cover. Once there, click on READ SAMPLE to see the pages within. I especially like the “measurements and conversions” page. Also, I make no money from any sales, I just love the idea of this book. Missing my mom as I do, seeing her handwriting always makes me feel closer to her. Give that gift to someone else by writing out a favorite recipe.


This orange marbled fudge is so pretty it’s almost a shame to eat it. It is little sweet, but that’s why we eat dessert, right? The orange part of the fudge has a natural orange flavor which is very pleasant. The white part of the fudge blends super well with the orange. My husband gave it his stamp of approval too.
Thank you so much, Roxann, glad you, and your husband, liked it.